Woodwork for the plotter
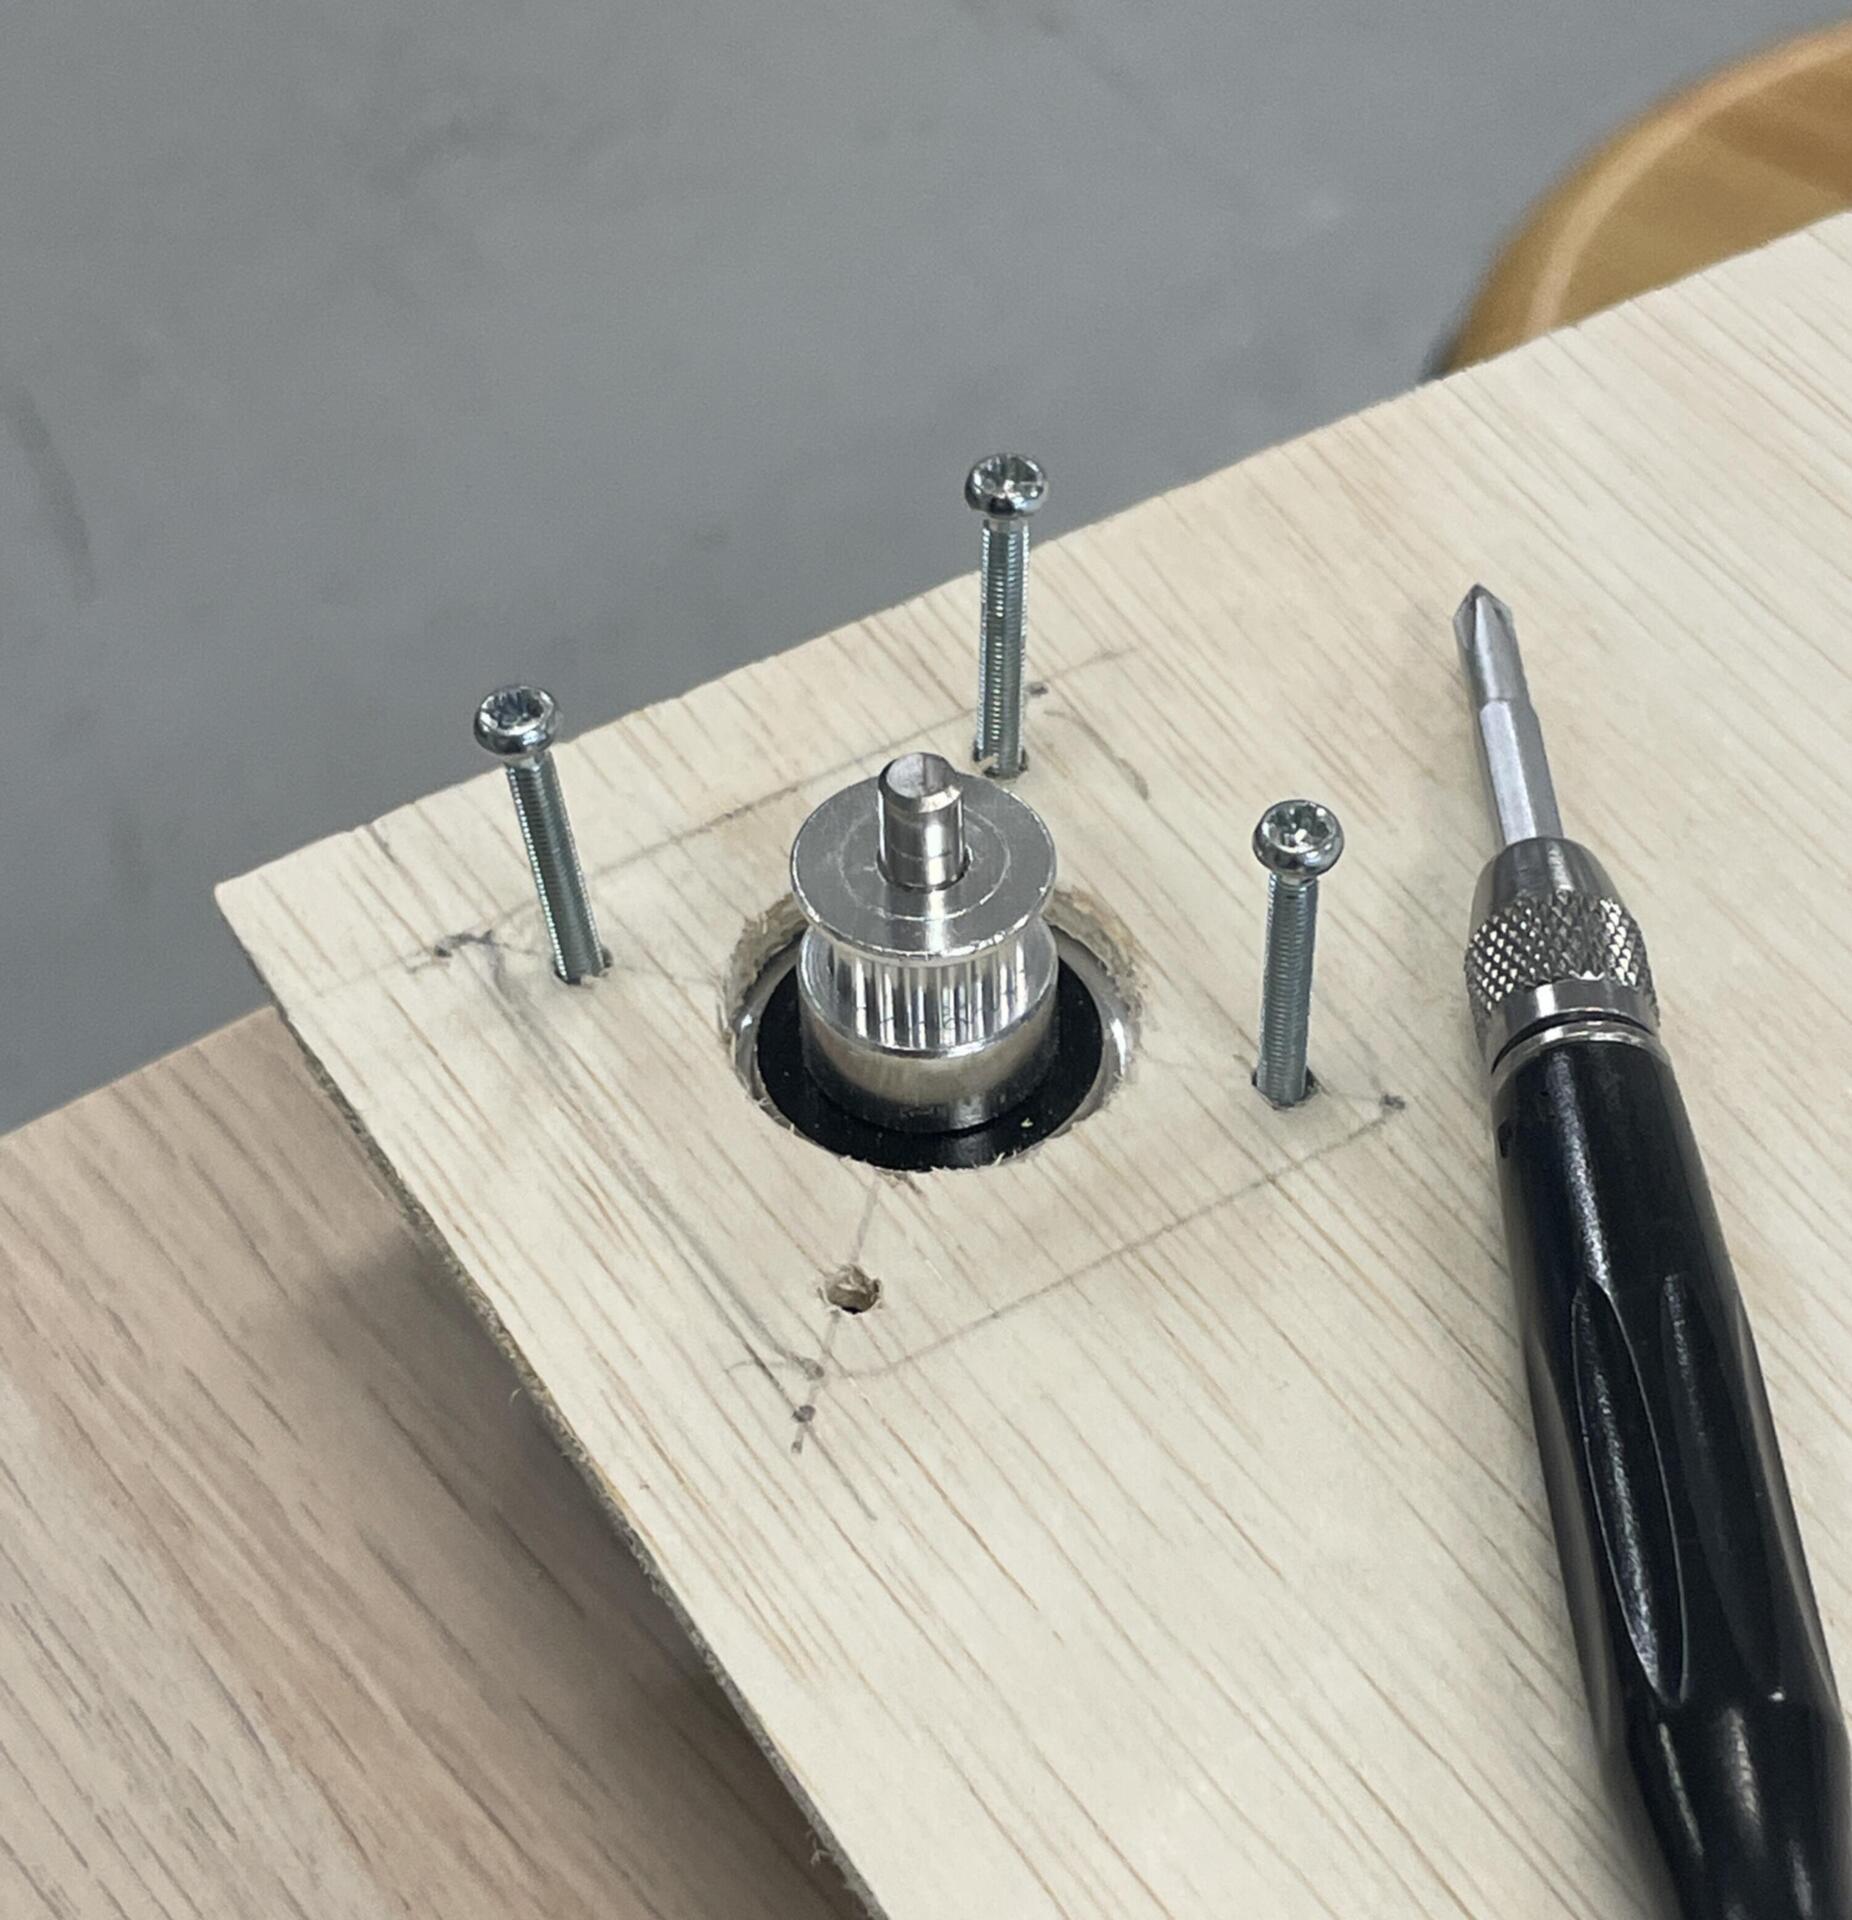
This week, I transitioned from the proof of concept to building the actual plotter, and it felt great to finally put all the planning into action. I procured all the necessary materials—wood, screws, and other hardware—and reached out to my friend Ikshu, who’s studying product design, for help with the woodwork at the workshop. We began by marking the spots where we’d attach the stepper motors on either side of the wooden board. Using a circle cutter on a hand drill, we drilled two precise holes to fit the front part of the motors. Once that was done, we carefully marked and drilled four small holes to secure the motors with screws. It was satisfying to see the motors in place, ready for the next steps.
Next, we moved on to building the pen holder. This involved drilling a pen-sized hole in the center of a small wooden piece and then securing two screws at the top to tie the cables in place. At the back of the board, we also drilled a hole large enough to fit a servo motor that would control the pen lift mechanism. Throughout the process, I quickly realized how much problem-solving was involved. Whether it was ensuring the measurements were accurate or figuring out the best way to secure the components, every step required careful thought. This experience taught me that working in a workshop requires a lot of prior planning—without it, time is wasted, and mistakes can be costly. It was a valuable lesson in efficiency and the importance of preparation before diving into hands-on work.
Assembly
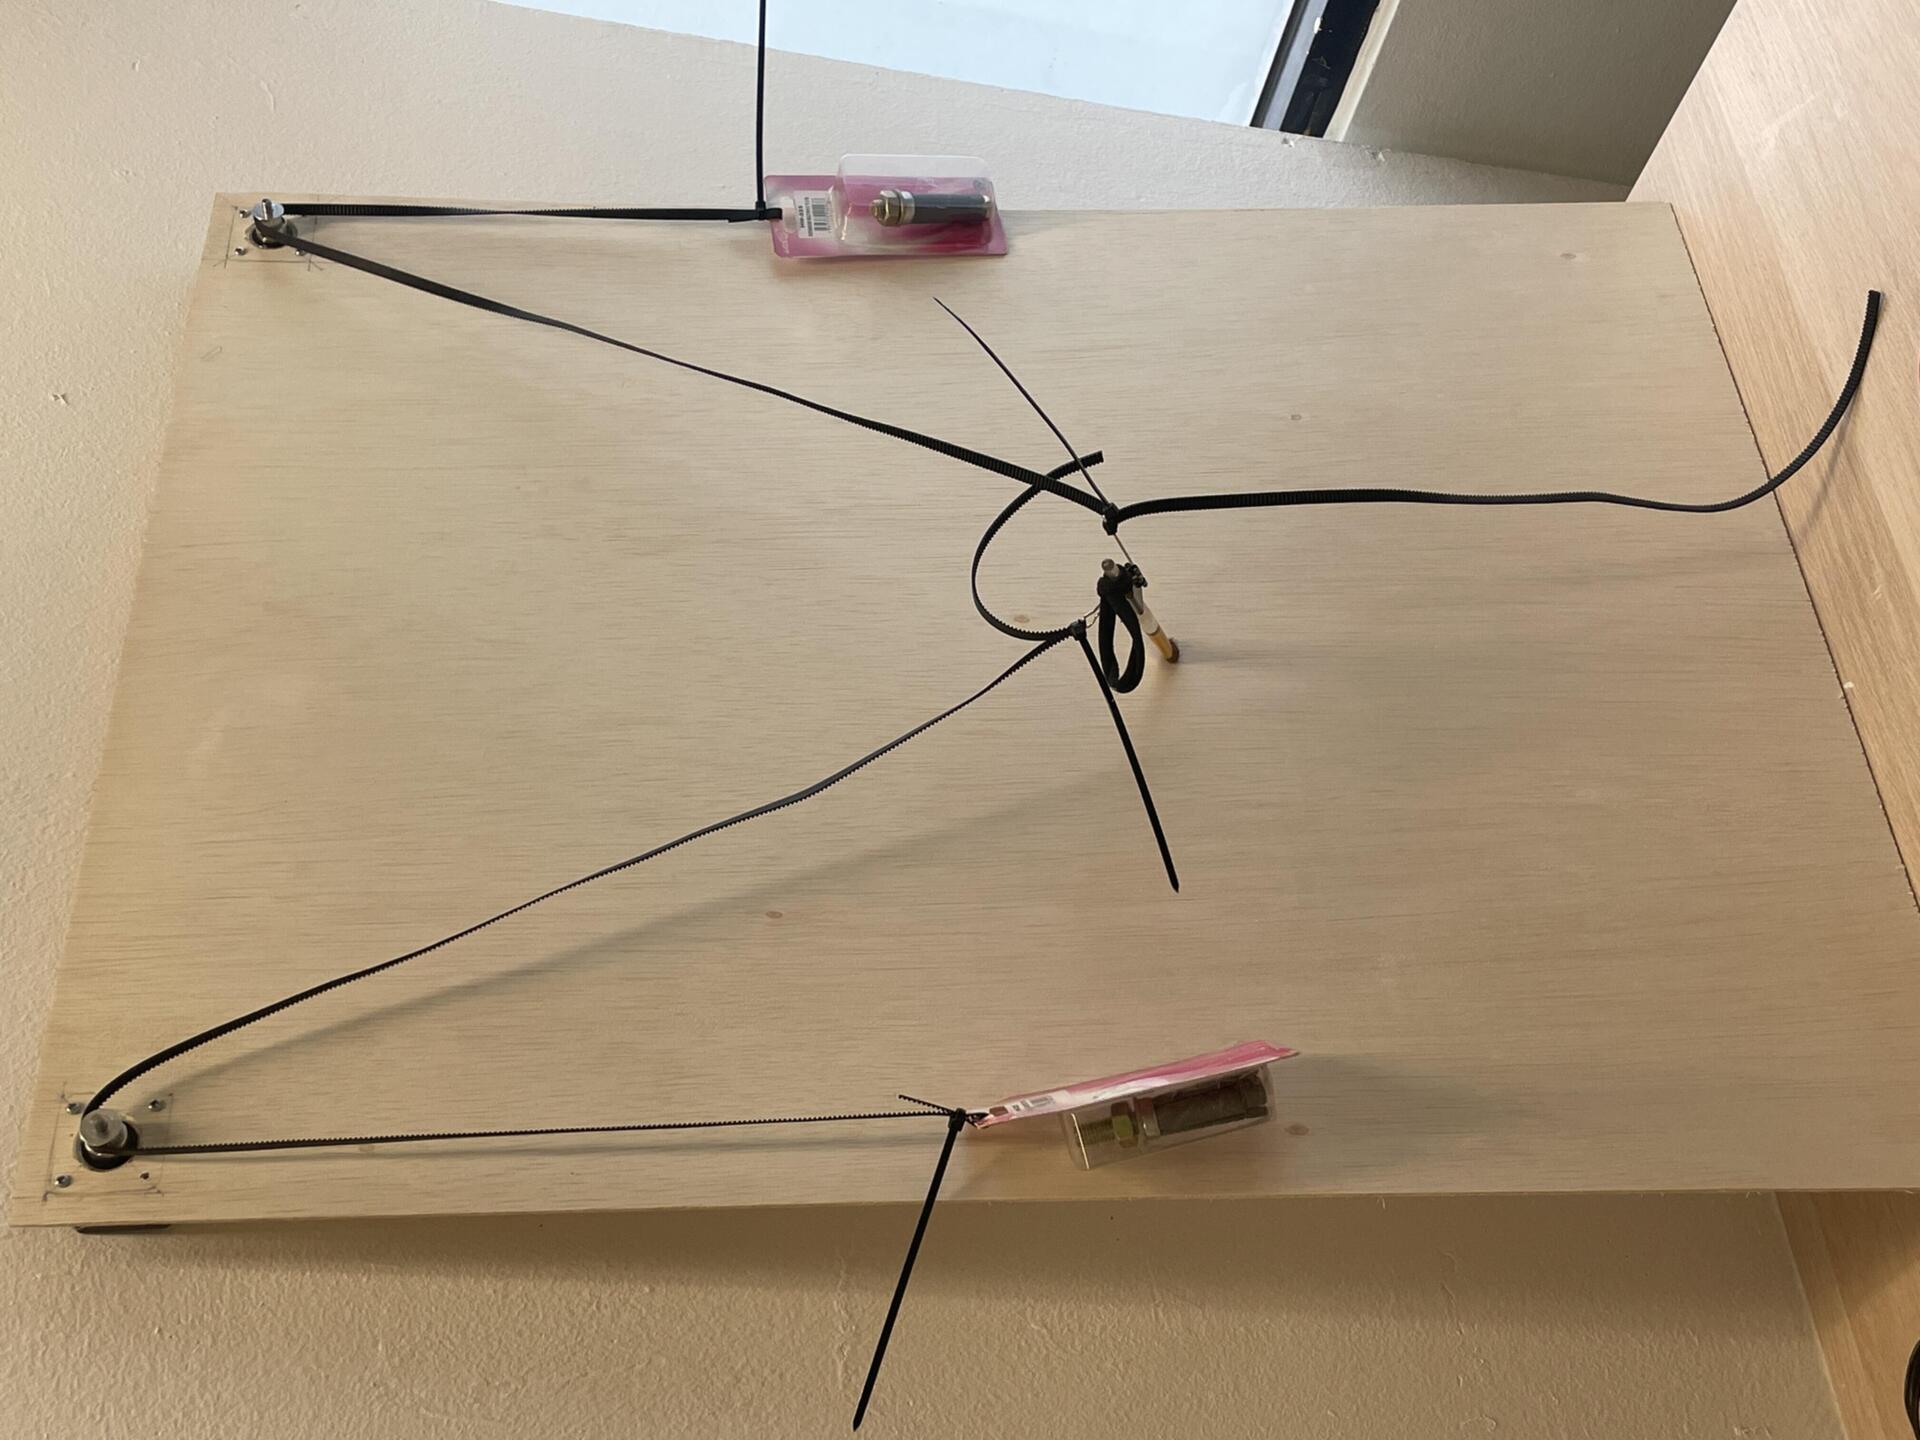
Moving on to the assembly of the plotter, I began by securing the stepper motors in place using screws and a screwdriver, ensuring they were firmly fixed to the wooden board. With the motors in position, I followed a YouTube tutorial to correctly set up the motor drivers and CNC shield with the Arduino. Wiring the stepper motors to a power supply was a crucial step, as it would provide the necessary current for smooth operation. Next, I attached the stepping belt to the pulleys and secured the pen holder to the other end of the belts, ensuring it could move freely across the plotting area. Seeing everything physically come together was exciting, as it meant I was one step closer to making the plotter functional.
Once the assembly was complete, I moved on to calibrating the program to match the exact measurements of the wooden board. This step was essential to ensure the plotter could move with precision and accuracy. However, things didn’t go as planned—despite my efforts, the calibration didn’t work the way I had intended. The movements weren’t aligning correctly, and I realized that fine-tuning the software to match the hardware setup required more tweaking than I had anticipated. While it was a bit frustrating, it was also a reminder that troubleshooting is an inevitable part of building a project like this. Now, I need to dive deeper into debugging the issue and refining the calibration process to get the plotter running smoothly.